

Table of Contents
- Why Preparing Your Home for a Termite Inspection Matters
- Your Termite Inspection Checklist: Step-by-Step Preparation
- How Long Does a Termite Inspection Take?
- Signs of Termite Activity in Walls to Check Before the Inspector Arrives
- AS 3660.2 Termite Management Standards: What Homeowners Should Know
- What Happens During the Inspection and What to Do If Termites Are Found
- Seasonal Preparation Variations for Termite Inspections
- Conclusion
- Frequently Asked Questions
Last Updated: September 30, 2026
Why Preparing Your Home for a Termite Inspection Matters
A good termite inspection starts well before the inspector arrives. Preparation is the difference between a thorough check of your whole property and a rushed walk-through that misses activity behind stored boxes.
Termite inspection is the process of assessing a property for termite activity, damage and risk. It covers the sub-floor, roof void, interior, exterior and yard.
Your Termite Inspection Checklist: Step-by-Step Preparation
Preparation comes down to access, visibility and documentation. Work through the protocol below in the 48 hours before your booking. Most homes need one to two hours of effort, and the sequence matters, do the access work first, then the documentation, so you are not photographing areas you have already disturbed.
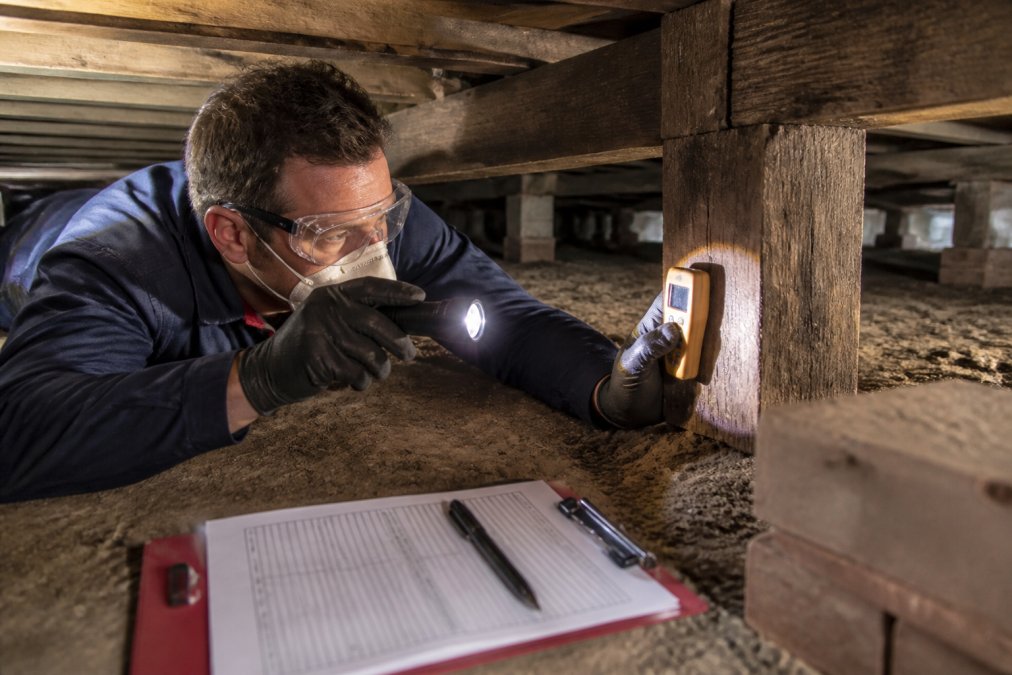
Homeowner clearing a sub-floor access hatch to prepare for a professional termite inspection checklist.
The 48-Hour Pre-Inspection Protocol
Day minus two, access and clearance
- Clear the sub-floor hatch and create a walkable path to it
- Clear the roof void manhole and shift anything stored near the entry point
- Move stored items off the floor in the garage, laundry, under-stair areas and wardrobes
- Pull furniture at least 300mm away from walls so skirting boards and wall bases are visible
- Trim plants, mulch and creepers back from external walls, aim for a clear gap of at least 300mm
- Move firewood, garden tools and timber offcuts away from the house and off the ground
- Confirm pets will be secured and children supervised on the day
Day minus one, moisture and maintenance
- Fix dripping taps, leaking downpipes and overflowing gutters
- Clear blocked drains and check that stormwater discharges away from the slab
- Check sub-floor ventilation openings are not blocked by soil, mulch or stored goods
- Note any damp patches, musty smells or swollen timber
Day of inspection, documentation
- Collect recent renovation receipts, council approvals and floor plans
- Have your photo log ready (see the documentation section below)
- Write down any cracks, bubbling paint, mud tubes or hollow-sounding timber you have spotted
- Clear a parking space and unlock gates, side access and the meter box
Why Each Step Matters
Access is the single biggest determinant of inspection quality. An inspector cannot assess what they cannot reach, and blocked access is recorded as a limitation in the report. That limitation can matter later during a pre-purchase inspection, an insurance claim or a warranty dispute, because it means part of the property was never assessed.
Digital Documentation Preparation
Most homeowners turn up empty-handed. A short photo log changes the quality of the conversation you have with your inspector.
Before the appointment, photograph:
- Any existing cracks in walls, ceilings, floors or render
- Previous termite damage and the repairs that were done
- Past treatment sites, chemical barriers, bait stations, physical barriers
- Renovation work, especially where timber was added or replaced
- Damp patches, water stains and areas of bubbling or blistered paint
How Long Does a Termite Inspection Take?
A standard termite inspection takes 45 to 90 minutes for an average home. Larger properties, difficult sub-floor access or multiple outbuildings can push it to two hours or more.
The time depends on four things:
- Property size: a three-bedroom home moves faster than a five-bedroom with extensions
- Access: clear hatches and tidy storage cut inspection time
- Block size: more yard means more perimeter to check
- Findings: if the inspector spots activity, they will stop and document it in detail
Signs of Termite Activity in Walls to Check Before the Inspector Arrives
Knowing the signs of termite activity in walls helps you flag problem areas early. You are not expected to diagnose anything. Your job is simply to point the inspector toward anything that looks unusual, and to document it so the inspector can compare your photos against what they see on the day.
What to Look For, and Why It Happens
- Mud tubes: pencil-width tunnels of dirt, saliva and faecal material running up walls, piers, foundations or along the edge of a slab. Subterranean termites build them to keep their bodies moist while travelling between the soil and a food source. They can also appear inside a sub-floor, behind a skirting board or in a roof void.
- Hollow-sounding timber: tap skirting boards, door frames and architraves gently with the handle of a screwdriver. Termites eat timber from the inside out, leaving a thin shell that sounds hollow or papery.
- Bubbling or blistered paint: moisture trapped behind paint can signal activity beneath. The paint may also look rippled or stained.
- Warped or sticking door frames: doors that suddenly stick or windows that no longer close cleanly can mean swelling timber, which often points to moisture or termite damage.
- Flying termites or discarded wings: alates (winged reproductive termites) swarm in warmer months, usually after rain. Discarded wings near windows, doors or light fittings are a common sign that a colony has released its reproductives.
- Frass or pellets: drywood termites push small, hard, six-sided pellets out of tiny holes in timber. These look like coarse sand or sawdust and often accumulate below the hole.
- Tight or bubbling floorboards: floorboards that feel springy, tight or uneven underfoot can indicate damage below.
How to Document What You Find
Do not disturb anything. Photograph each sign with something for scale, a coin, a ruler or your hand, and note the room, the surface and the date. If you find mud tubes, do not break them open. Leave them intact so the inspector can confirm whether the termites are active.
What to Do If You Find Termite Damage
If you find damage rather than live termites, the same rule applies: do not disturb it. Photograph it, note the location and tell the inspector when they arrive. Damage that looks old may still be part of an active colony, and only an inspector can tell the difference.
When to Call Before Your Booking
Most signs can wait for your scheduled inspection. Call the inspector ahead of time if you find:
- Live termites
- A mud tube that appears to have grown since you last looked
- Damage that has appeared suddenly, especially near a doorway or load-bearing wall
- A swarm inside the house
AS 3660.2 Termite Management Standards: What Homeowners Should Know
AS 3660.2 is the Australian Standard that sets out how a termite inspection should be carried out. It covers how inspectors assess a property, what they must check, and how findings are reported.
What Happens During the Inspection and What to Do If Termites Are Found
The inspector works from the outside in. They check the yard, gardens, fences and retaining walls, then move to the sub-floor, interior and roof void. They use a torch, moisture meter and sometimes a sounding tool to test timber.
If they find termites, here is what to do:
- Stay calm and do not disturb the area
- Ask the inspector to confirm whether the infestation is active
- Request a written report with photos and a treatment plan
- Get a quote for treatment before you agree to anything
- Book treatment promptly, because damage compounds over time
Post-Inspection Remediation Roadmap
Treatment is step one, not the finish line. Use this roadmap to plan the months after an inspection:
- Week 1: review the report and book treatment if activity is confirmed
- Month 1: complete any timber repairs and fix moisture sources
- Month 3: recheck treated zones and confirm the chemical barrier is intact
- Month 12: book your annual inspection and update your records
Seasonal Preparation Variations for Termite Inspections
Timing changes what you need to do before an inspection. Termites stay active year-round, but their behaviour shifts with the seasons.
Conclusion
Preparing for a termite inspection takes an afternoon, but it decides how much the inspector can actually see. Clear access, tidy storage and a short list of concerns give you a report you can trust.
Frequently Asked Questions
What should I do to prepare my home before a termite inspection?
Clear at least 300 mm of space around the perimeter of your home, including the sub-floor and roof void access points. Remove stored items, boxes, and timber furniture from against walls. Trim vegetation back from the foundations, fix any leaking taps or gutters, and ensure the inspector can reach all areas. A simple termite inspection checklist helps you stay organised and ensures nothing is missed.
How long does a termite inspection take?
Most termite inspections take between 1 and 2 hours for an average-sized home. Larger properties with complex layouts, multiple sub-floor areas, or difficult access can take longer. A thorough inspection should never be rushed, so allow at least half a day for the appointment.
Do I need to move furniture away from walls for a termite inspection?
Yes. The Australian Standard AS 3660.2 recommends a clear inspection zone of at least 300 mm around the internal and external perimeter of the building. Move furniture, boxes, and stored items away from walls so the inspector can check for termite mud tubes, damage, or moisture. Pay particular attention to timber furniture, which can hide signs of termite activity in walls behind it.
What happens if the inspector finds termite activity?
If the inspector finds active termites, they will document the location and extent of the infestation. You will receive a report outlining the findings and recommended treatment options, which may include chemical barriers, baiting systems, or targeted localised treatments. It is important to act quickly to prevent further damage to wooden structures. A follow-up inspection is usually scheduled to confirm the treatment has worked.