
Table of Contents
- What You’ll Need Before You Start Carpenter Ant Pest Control
- Carpenter Ant Infestation Signs to Check First
- Carpenter Ants vs Termites: Which One Is It?
- How to Get Rid of Carpenter Ants: Step-by-Step
- Choosing Carpenter Ant Treatment: Baits, Dusts and Sprays
- Doing It Safely Around Children, Pets and Pollinators
- Common Mistakes to Avoid
- Frequently Asked Questions
Last Updated: October 19, 2026
What You’ll Need Before You Start Carpenter Ant Pest Control
Carpenter ant pest control works best when you gather a few basics first. At Redback Pest Control Sydney, we’ve spent more than 30 years treating homes and businesses, and the jobs that go smoothly are the ones where someone did a little homework before reaching for a spray can.
Here’s your kit:
- A bright torch and a flat-head screwdriver for probing timber
- A notebook or phone camera for recording what you find
- Gloves and a dust mask if you’ll be handling any product
- Sealable bags for collecting a few ants to identify
- The product label, read fully, before anything else
One warning before you begin: carpenter ants look a lot like several harmless species. Misidentifying them wastes money and time.
Spraying a random insecticide on the first ant you see often makes things worse. Repellent sprays scatter the colony and split it into satellite nests, so the problem spreads instead of ending.
Carpenter Ant Infestation Signs to Check First
Carpenter ant infestation signs show up in three main places: along trails, near nest entrances, and in the timber itself. Start your inspection where moisture collects, because damp wood is what draws these ants in.
Frass, Trails and Wood Damage
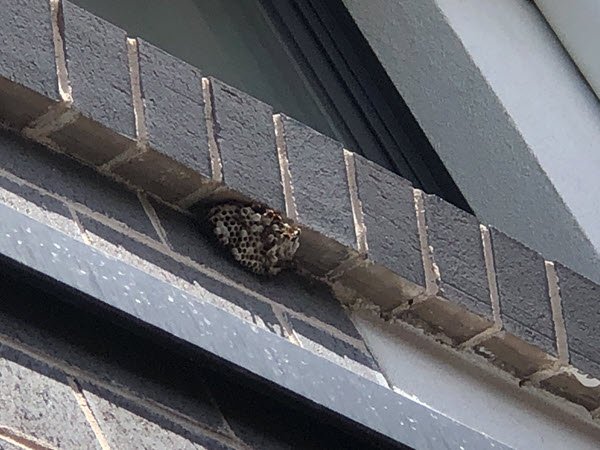
Frass is the sawdust-like debris ants push out of their tunnels. It often collects in little piles below a nest entrance or along a skirting board.
Look for these signs:
- Fine wood dust under timber frames or window sills
- Worn trails along fences, pipes, or garden edges where ants travel
- Small holes in wood with frass spilling out
- Hollow-sounding timber when you tap it
- Ants active at dusk or after rain
Carpenter ants don’t eat wood. They excavate it to build galleries, which is why the damage looks clean and smooth inside rather than crumbly.
Carpenter Ants vs Termites: Which One Is It?
Carpenter ants and termites cause very different damage, and telling them apart changes your whole treatment plan. The quickest test is the body shape, but a few other features confirm it.
- Carpenter ants: pinched waist, bent (elbowed) antennae, two pairs of unequal wings, and a body that is often black, brown or reddish-brown
- Termites: straight waist, straight bead-like antennae, four wings of equal length, and a pale, translucent body
Termites eat wood and leave it looking hollowed and papery, often with mud tubes along foundations. Carpenter ants tunnel through it and push out frass, and they do not eat the wood itself.
Lookalikes That Waste Your Time
Several harmless species are routinely mistaken for carpenter ants, and treating the wrong one is a common reason DIY jobs fail:
- Black house ants are smaller, do not excavate timber, and rarely nest in wall voids.
- Odorous house ants have a uniform body and give off a coconut-like smell when crushed; they trail in kitchens but do not produce frass.
- Slater or white-footed ants are smaller and paler, and forage on surfaces rather than inside timber.
- Flying ants versus termite swarmers: if you see winged insects, check the waist and antennae before assuming termites, swarmers of either species appear after rain.
A simple field test: tap the timber. A hollow, papery sound with frass below points to carpenter ants; soft, crumbly wood with mud tubes points to termites. If you are unsure, bag a few insects and get them identified before you treat anything.
This is also where a professional pest inspection earns its keep. A trained eye spots the difference in seconds, and that matters because treating for the wrong pest wastes weeks.
Photograph the insect from above and from the side, then compare the waist and antennae against a reliable identification guide. A clear photo is often enough for a professional to confirm the species remotely.
How to Get Rid of Carpenter Ants: Step-by-Step
Getting rid of carpenter ants means finding the colony, treating it with the right product, and confirming it’s gone. Skip any of those three and the ants come back.
Step 1: Find the Nest and Its Entrances
Follow the foraging ants back to their source, ideally after dark when they’re most active. Check damp areas first: bathrooms, kitchens, laundry corners, and any timber touching soil outside.
Mark every entrance you find. A main colony can run satellite colonies nearby, so expect more than one nest.
Tap along timber with a screwdriver and listen for a hollow, papery sound. A dull thud usually means solid wood; a light rattle often means a gallery underneath.
Step 2: Pick and Apply the Right Treatment
Match the product to the location. Baits work well where ants forage widely. Dusts suit wall voids and cracks. Sprays are best for outdoor perimeter work, not for blasting a nest directly.
Apply to cracks and crevices, not open surfaces. Always follow the label rate and never mix products unless the label allows it.
Step 3: Monitor, Refresh and Verify
Give the treatment time. Baits can take days to weeks to work through a colony. Check your bait stations every few days, refresh them when they’re empty, and keep watching for new ant activity.
Success looks like this: no ants on the trails, no fresh frass, and no new entrances. If activity continues past a few weeks, the nest wasn’t fully reached.
| Step | What You Do | Timeframe | Success Sign |
|---|---|---|---|
| Find the nest | Follow trails, tap timber, mark entrances | 1 evening | Nest and entrances located |
| Treat | Apply bait, dust or spray per label | 1 session | Product placed in target zones |
| Monitor | Check stations, refresh bait, watch trails | 2-4 weeks | No new ant activity |
| Verify | Re-inspect timber and entrances | 4 weeks | No frass, no trails |
Choosing Carpenter Ant Treatment: Baits, Dusts and Sprays
Treatment choice comes down to where the ants are and how far the colony spreads. There is no single best product, only the right one for the job, and the delivery method matters more than the active ingredient.
Match the Product to the Location
- Liquid bait and bait stations: best for wide foraging areas and hard-to-reach nests. Ants carry the bait back to the colony, so it works slowly but reaches ants you cannot see.
- Dust treatment: ideal for wall voids, roof spaces, and cracks and crevices. A light application is enough; over-application makes ants avoid the treated zone.
- Non-repellent insecticide: lets ants carry the active ingredient back to the colony without detecting it, which is why it pairs well with baiting.
- Spray treatment: suits outdoor perimeters and entry points, not indoor nest blasting. Repellent sprays can scatter a colony and split it into satellite nests.
Why Spraying First Can Backfire
A common pattern is to spray the first ants you see, then wonder why activity increases. Repellent sprays kill the ants present but do not reach the colony, and the survivors often relocate. If you plan to bait, avoid spraying the same trails first, the residue can make ants avoid the bait. Treat the nest and the trails as one system, not as separate problems.
A Simple Selection Sequence
- Confirm the species and find the nest entrances.
- If the nest is accessible and the colony is small, a dust or non-repellent spray applied to the entrance can work.
- If the nest is hidden or the colony is large, start with bait and give it time.
- Use perimeter sprays only after the colony is under control, to reduce reinvasion.
For serious or recurring infestations, a professional exterminator brings better tools and a proper treatment timeline. Our team at Redback Pest Control Sydney handles ant control alongside Termite Control, so a single visit can rule out the lookalikes too.
Never mix products unless the label allows it, and never apply a repellent spray over a bait station. The label is the law, and the label rate is there for a reason.
Doing It Safely Around Children, Pets and Pollinators
Safety comes down to placement, timing, and reading the label. Every product you use must be applied exactly as directed, and the label is the law.
- Keep baits and stations out of reach of kids and pets
- Apply dusts and sprays when children and pets are away from the area
- Never spray flowering plants where bees forage
- Store products locked away, in original containers
- Wash hands and clothing after handling anything
If you’re worried about chemicals around family or pets, professional pest control is the safer route. Our family-safe guarantee means treatments are planned around the people and animals in the home, not just the ants.
Common Mistakes to Avoid
Most failed carpenter ant jobs come down to a handful of repeated errors. Here’s what we see most often.
- Spraying visible ants instead of finding the nest
- Using repellent products that split the colony
- Treating dry wood while ignoring the moisture problem feeding it
- Skipping the follow-up check and assuming the job is done
- Guessing at identification instead of confirming the species
Fix the moisture source too. Damp timber invites reinfestation, so repair leaks and improve ventilation after treatment. Long-term control means removing what attracted the ants in the first place. When you’re ready to hand it over to the professionals, you can Book On Line in a couple of minutes.
The colony, not the ant on your bench, is the target. Find the nest, treat it properly, and verify it’s gone.
Frequently Asked Questions
How can I tell if I have carpenter ants?
Look for foraging ants on walls, window frames and benchtops, especially after dark, plus small piles of sawdust-like frass near cracks and kick-out holes. Carpenter ant trails often run along edges and plumbing lines. Knock on suspect timber: a hollow, papery sound can point to excavated galleries. If you find winged ants indoors in spring, an established colony is likely nearby. Confirm the species before treating, because black ants and termites are often mistaken for carpenter ants.
Do carpenter ants damage wood?
They do. Carpenter ants don’t eat timber the way termites do, but they tunnel through it to build nests, and they prefer wood that is already damp or decaying from a leak. Over time those galleries weaken structural timber, door frames and roof void timbers. The damage usually builds slowly, which is why catching a carpenter ant infestation early and fixing the moisture source matters as much as the treatment itself.
How long does carpenter ant treatment take to work?
With a non-repellent bait or dust treatment, foraging ants start carrying the active ingredient back to the nest within days, and colony activity typically drops over two to six weeks depending on colony size and how many satellite nests are involved. Expect to refresh bait stations and re-check during that window. If activity continues well past that period, the nest may not have been found, so a follow-up inspection is the next step.
When should I call a professional for carpenter ant pest control?
Call a professional if you can’t locate the nest, if ants keep returning after DIY baiting, if you find winged ants indoors, or if there is visible wood damage or damp timber you can’t trace. Multi-storey buildings, roof voids and wall cavities are hard to treat properly without the right equipment. A licensed pest technician can confirm the species, find satellite colonies and set up a monitoring and prevention plan so the problem doesn’t come back.
Carpenter ants are persistent, and a half-finished job invites them straight back. If you’d rather skip the guesswork, our team at Redback Pest Control Sydney brings over 30 years of experience, family-safe treatments, and a pest control warranty behind the work. We also offer specialised termite dog inspections if you’re worried the damage isn’t ants at all. Get a free quote and we’ll confirm what you’re dealing with before anything is sprayed.